| < Previous page | Print version | Next page > |
Drop-down Menus
The drop-down menus are as follows:
.

In outline their functions are as follows.
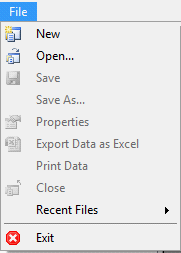
File
View

Solution Explorer - This gives you the choice of either showing or removing the Project. Solution Explorer is explained further later under 'Managing your model'.
Data Explorer - This option works similarly to the Solution Explorer, allowing you to choose whether you want your data displayed or not.
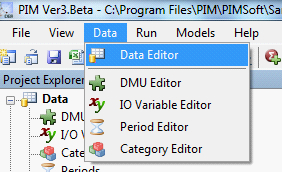
Data
This allows you to change certain characteristics of your data. Please see 'Managing your Model' for further details.
Run
This is a simple icon allowing you to immediately run your model. Running your model is explained further in the 'Running your model' section.
Models
This toolbar allows you to either create a new model or copy an existing model. It also allows you to further specify your model options.
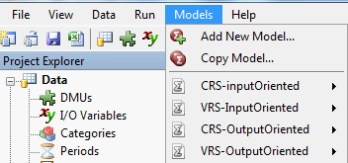
The drop down menu here has two parts. The first part has two options:
- Add New Model
- Copy Model.
Add New Model allows you to create a new model in terms of input-output variables, related data, input or output orientation, returns to scale to be assumed, and so on. This is explained in more detail in the next two chapters.
Copy Model allows you to copy an existing model. You would normally use this option to modify an existing model rather than specify a new one from scratch.
The second part of the Models Toolbar displays any existing models in the current project. If you select an existing model then a sub-menu appears which is itself subdivided into two parts. The first part has the following four options: (illustrated below).:
Edit - This allows you to change the specification of the model (e.g. orientation, returns to scale etc) ;
Delete - This simply allows you to delete the model, checking you do indeed wish to carry this through before actually deleting the model.
Run - This allows you to run the selected model.
Rename - This simply allows you to rename the model concerned.
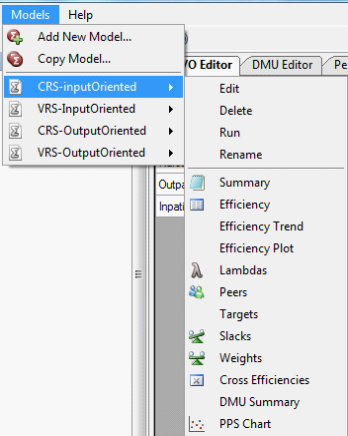
The second part of the sub-menu for the selected model under Models allows you to display the results from running the model concerned. These tables and graphs of results are explained in more detail later.
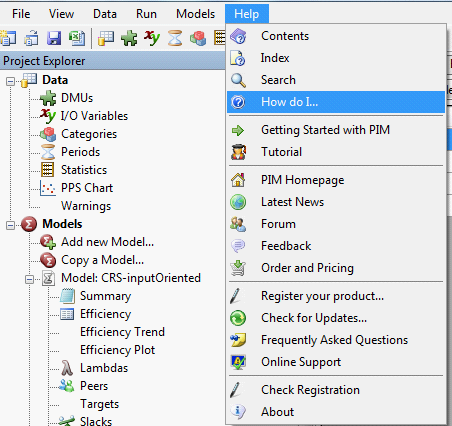
Help
This toolbar is there for your assistance throughout your use of the PIM DEASoft-V3 software.
 |